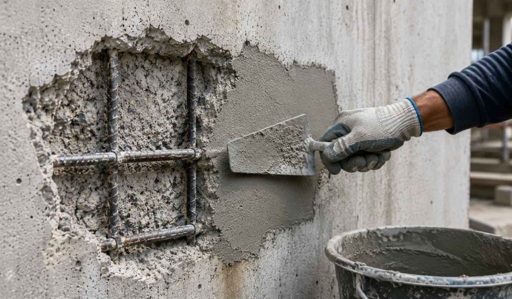

Whether the project uses a cementitious non-shrink grout or an injection anchoring system, the same objective applies: prepare sound concrete, follow the approved installation method, eliminate voids and allow the system to cure before loading.
1. Select the system for the actual duty
Start with the design requirement, not with a generic product label. Define loads, base material condition, anchor diameter and embedment, grout thickness, exposure, vibration, temperature, chemical environment, application method and required strength-development time. For anchors, edge distances, spacing, cracked or uncracked concrete condition and load direction must follow the approved design and system requirements.
2. Prepare the substrate and drilled holes correctly
Remove weak concrete, laitance, dust, oil, curing compounds, loose material and standing water where the product instructions prohibit it. For cementitious grouts, concrete preparation commonly includes cleaning, roughening and pre-soaking, followed by removal of excess water so the substrate is damp but not waterlogged.
For post-installed anchors, drill the specified diameter and depth, then use the cleaning sequence required by the selected anchor system. Cleaning is not optional: residual drilling dust can reduce bond and anchorage performance.
3. Mix and place grout continuously
Use clean equipment, measured water and the stated mixing procedure. Do not add excess water to make a grout flow more easily. Before placement, ensure formwork is rigid, sealed and arranged so the grout can travel across the void in one continuous direction.
Place cementitious grout from one side only wherever practical, fill anchor-bolt pockets and keyways first, and maintain continuous flow to minimise air entrapment, cold joints and incomplete bearing beneath a base plate.
4. Install injection anchors from the bottom of the hole
For injection systems, prepare the cartridge and static mixer as specified, discard the initial unmixed material, then inject from the back of the hole while slowly withdrawing the nozzle. This helps avoid air voids. Insert the threaded rod or rebar using the approved twisting action and observe the product’s working time and full curing time before applying load.
5. Protect, cure and verify before loading
Protect fresh grout and anchors from vibration, rapid moisture loss, early loading and unsuitable temperature conditions. Cure cementitious grout in accordance with the product instructions. Verify dimensions, grout continuity, anchor embedment, installation records and any required pull-out or proof-load testing before handover.
Common failure causes
- Incorrect product selection for the actual loading, thickness, temperature or exposure condition.
- Weak, contaminated or inadequately prepared concrete surfaces.
- Incorrect water addition, inadequate mixing or placing after the workable-life limit.
- Poor formwork, interrupted flow or trapped air below base plates.
- Incorrect hole diameter or embedment, incomplete cleaning or air voids in injection anchors.
- Loading before the stated cure period or without required site verification.
What ChemBeton QC & R&D can offer
- Review of grout or anchor requirements against load, geometry, substrate and exposure conditions.
- Laboratory evaluation of flow, density, setting, expansion, compressive strength, bond and application behaviour where relevant.
- Technical support for trial areas, base-plate grouting mock-ups and anchor-installation demonstrations.
- Product-specific method statements, QA checklists and site training support.
- Troubleshooting support for flow, filling, curing, bonding and anchorage-installation concerns.
Conclusion
Grouting and anchoring reliability is achieved by treating the work as a controlled system: correct specification, disciplined preparation, measured mixing, continuous placement, proper curing and documented verification. ChemBeton supports contractors and project teams with product selection, trial support and practical installation guidance for dependable load transfer and long-term service.